
Montreal: Art, Coffee and Chocolate

I don’t really have an excuse as to why, having been born and raised in Toronto and having studied in Kingston, Ontario, a stone’s throw from Montreal, I’d never visited this vibrant city.

I don’t really have an excuse as to why, having been born and raised in Toronto and having studied in Kingston, Ontario, a stone’s throw from Montreal, I’d never visited this vibrant city.
One of the best ways I’ve ever ended a hectic exam-period was by going to the female-only hydrotherapy spa; Body Blitz!
Scandinavian (Hydrotherapy) Spas involve putting the body through a series of hot and cold cycles (a sauna/warm bath followed by a roll in the snow or a plunge in a cold tub). This hot-and-cold hydrotherapy technique helps to improve circulation, which strengthens the immune system, circulates lymph and can leave your skin looking bright and invigorated, even in the dull of winter. Here’s how to create a Scandinavian Spa at home, in your shower.
Alternate Hot and Cold Showers:
Alternate showers increase circulation, boost energy, help the body detoxify by moving lymph and strengthen the immune system, preventing unwanted colds and flu during the winter months. Here’s how to do them at home:
This technique may feel uncomfortable at first, but after a few cycles, you begin to welcome the cold water’s revitalizing feel and the practice becomes as natural as having a shower the regular way.

 I was first brought to this little pocket of African culture in the city of Toronto by my good friend, K.
Sometimes I wonder about the so-called “health food” that we encounter in health food restaurants like Fresh in Toronto. I mean, what exactly constitutes a health food?
Are fried onion rings healthy just because they were breaded with quinoa instead of corn batter? I am inclined to say no: fried onion rings, whether they are breaded with quinoa or corn, are still fried. Sometimes our good intentions fail when we prepare healthy foods in the same, unhealthy way as fast foods.
I think it was Meghan Telpner of “Making Love in the Kitchen” who said that a health food is a food that promotes health, not just a food that doesn’t cause disease. Does that mean that those with a fetish for salty, crispy snacks face a lifetime of deprivation? I assure you not! Allow me to present The Kale Chip: a salty, crunchy snack that will indeed make you healthier! As Dr. Phil R. says, “It’s like sunshine for your cells.” (Well, maybe not, but they’re still great for you!)
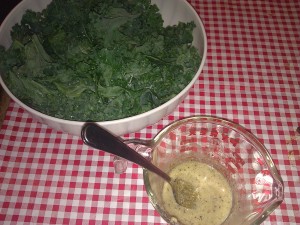
Kale is a dark, leafy green, full of flavenoids (potent anti-oxidants), vitamins, minerals and fibre. It can be cooked like spinach, used instead of lettuce in salads and, best of all, slowly baked into crispy, savoury chips, to satisfy your salty tooth!
How to make them:
The Kale
I buy a huge bundle of kale for $2.99 at Metro at Spadina and Bloor. This bundle is good for at least two batches of kale chips. Break up the kale leaves into chip-sized pieces, wash them thoroughly and drain out any excess water.
The Dressing
– 1 tbsp apple cider vinegar
– 1 tbsp tahini
– 1 tsp garlic powder
– pinch of salt
(if you find that the dressing isn’t enough to adequately cover the kale pieces, increase the amounts in the appropriate ratios to make more).
All good chips come with seasoning (come on, when was the last time you craved plain chips?). To make this health-promoting seasoning, add apple cider vinegar, tahini, garlic powder and salt together and mixed well to create a sauce. Then pour the sauce over the bowl of kale pieces and toss thoroughly to cover the kale evenly.

Next, spread the dressing-covered kale pieces onto a baking sheet and set your oven on its lowest temperature: in my case, 140 degrees.
")
Let the kale bake for 4 hours, turning the leaves over at the midway (2 hour) mark.
After 4 hours, take them out, let them cool and, in the morning, pack these little babies into a little container to take with you to work or class. For me, a 5-hour nutrition class goes by much more smoothly when I have a delicious, vitamin-packed snack to munch on!

Maybe it’s the stress from being in class for long hours, the assignment deadlines and almost monthly exams we have, but CCNM really takes a toll on my skin.
Flawless skin is a tricky thing to achieve, as factors such as stress levels, hormone balance and food sensitivities, among other things, come into play. Whatever the reason, I always find that the start of school coincides with an episode of bad breakouts. Fortunately, there are healthy ways to cleanse, clarify and nurture stressed skin that are cheap and effective and can be done at home, with ingredients from your kitchen.
For this 3 Step Facial, the only product I recommend buying is Treemenda 100% Tea Tree Oil. Other tea tree oils cause skin to redden but I find that this essential oil to be more gentle. It’s perfect for treating skin blemishes (from cold sores, acne or fungal infections) and can be used for antimicrobial steam inhalations when you’re feeling “stuffy”. It’s been the single best natural skin care product I’ve purchased. Other than that, you’ll also need:
1 large glass bowl
1 medium sized dish towel
1 handful of baking soda
1 kettle for boiling water
1 tbsp all natural plain yogurt
1 egg (separate the egg white)
Step 1: Baking Soda Exfoliation
I find baking soda to be a great exfoliant for sloughing off dead skin cells and makeup. Fill one hand with baking soda and slowly add warm water to create a paste. Use the paste to gently scrub your face in circular motions. Rinse well with warm water. This step helps cleanse the skin, remove excess oils and pore-clogging debris and encourages skin cell turnover.
Step 2: Tea Tree Steam Facial
Boil water in the kettle and pour it into the glass bowl, filling it to a depth of about 10 cm. Add two drops of the tea tree oil. Lean your head over the bowl and cover your head with the dish towel. The scent from the tea tree can be strong at first. If you find it too overwhelming, remove the dish towel momentarily to release some of the steam. Keep your head over the bowl at a distance that feels comfortable for your face (not too hot) and at which you can inhale comfortably through your nose. This exercise is also great for head colds and relieving sinus and nasal congestion. However, please don’t attempt this if you suffer from asthma. The steam encourages the pores on your face to open and release sweat, thereby clearing out the bacteria, dead cells and excess oils that cause acne. The tea tree is antimicrobial, which also aids in killing the bacteria that can cause skin blemishes.
Perform the steam facial for 10 minutes or until you feel that there is no longer any steam being released. Finish by rinsing your face with cold water. I sometimes like to repeat this step to get maximum benefits. Always finish with a cold water rinse to close the pores.
Step 3: Nutritive Face Mask

I have to give credit to my wonderful intern at the Robert Schad Naturopathic Clinic for this effective skin-care tip. In a small bowl, mix the egg white and 1 tbsp of natural plain yogurt until blended. Apply this mixture evenly to your face (avoiding lips and eyes). Leave until dry and then rinse off with lukewarm water. The mixture feels tight and pulls out impurities, yet adds nutrition and moisture to skin. This mask is easy to do and leaves your skin feeling supple and soft.
Finish by applying your favourite natural moisturizer, or a few drops of Jajoba oil and then go do something relaxing (like go to bed)! Your skin will thank you for it.
I’m sure all of you can name the 4 taste receptors that scientists have discovered on the tongue: sweet, sour, salty and bitter. However, Ayurvedic medicine has categorized food properties into 6 distinct tastes.
Some of the constitutional doshas require more of certain tastes than others, but it is thought that well-balanced meals encompass all 6 of the Ayurvedic tastes, covering the entire spectrum of food quality. The 6 Ayurvedic tastes are: sweet, sour, salty, bitter, pungent and astringent.
According to Ayurveda, balancing the 6 tastes in the diet aids digestion, ensures physical, emotional and mental well-being and helps decrease aggravation of the dominant dosha of an individual.
About the tastes:
Sweet:We can all easily identify sweet foods, such as honey and fruits. However, sweet taste also includes carbohydrates like rice and other grains, potatoes and milk. Sweet functions include building up tissues and calming nerves.
Sour: Includes acidic fruits such as oranges, lemons and grapefruit, fermented foods (yogurt, kambucha, sauerkraut), alcohol and vinegar. Sour taste acts to cleanse the body and increase the absorption of nutrients.
Salty: Foods that contain salt, from minerals, meat or seaweed. Salt acts to stimulate digestion and improve the taste of food. It also calms nerves and relaxes the mind.
Bitter: Includes dark leafy greens and certain herbs and spices. We often lack enough bitter tasting foods in our Standard American Diet, however, bitter taste is important for detoxification and digestion. According to our Botanical Medicine class, it improves appetite, aids digestion and psychologically “increases one’s appetite for life”.
Pungent: Foods that are spicy, including herbs, peppers and garlic. Pungent tastes increase metabolism and aid digestion.
Astringent: These are foods that produce a “dry” taste in the mouth. Foods that are astringent include legumes, certain fruits, such as apples and pears, certain vegetables, tofu and herbs. Astringent taste helps “dry” fats, thereby aiding weightless, and tightens tissues. In Western Herbalism astringent herbs are used for wound healing and tonifying mucus membranes of the skin, respiratory, urinary and digestive tracts.
Although having a balance of the 6 tastes is beneficial for a healthful diet, increasing certain foods in the diet can help balance the dosha that one is predominant in:
Vata Dosha is balanced by sweet, salty and sour tastes.
Pitta Dosha is balanced by sweet, bitter and astringent tastes.
Kapha Dosha is balanced by bitter, pungent and astringent tastes.
In the Western world we rely heavily on sweet, sour and salty tastes, through a diet high in carbohydrates, processed foods (high salt content) and alcohol (sour). Considering the fact that we live in a Vata-aggravated society, it is comprehensible that our culture gravitates to these tastes more than the other three. However, the leading rise in obesity (Kapha aggravation) could be reflective of the lack of bitter, pungent and astringent tastes in our diets.
In my Ayurvedic course we analyzed various ethnic diets and found that cultures with a set of dietary practices usually include all 6 tastes in their cuisine. We examined Indian, Thai, Persian, Ethiopian and Chinese cuisines, but I also feel that even Italian food represents a balanced diet, according to Ayurveda.
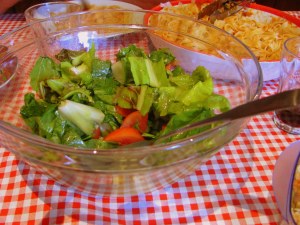
If we take a typical Italian meal – pasta with meat sauce and Insalata Della Nonna– we see that all 6 tastes are represented.

The sweet tastes are represented by the pasta (be it rice pasta, spaghetti squash or another form of pasta), the tomato sauce and some of the vegetables in the salad.
The salty tastes are from the salt and meat added to the sauce.
The sour taste is from the homemade red wine vinegar salad dressing (and the wine!).
The bitter taste comes from the radicchio and fresh garden lettuce in the salad.
The pungent tastes come from the garlic and chili peppers used to make the pasta sauce.
The astringent tastes comes from the fennel and celery in the salad and the apple for dessert.
Dissecting your daily meals for tastes that your diet may be missing is a fun and therapeutic practice. Use it to see how your own diet (whether it is one you have invented for yourself or the one dictated to you by your family or country of origin) may be improved by adding certain flavours. I find it aids me in achieving balance in my own diet, especially when traveling to a new country or designing my own meals. Practicing mindful eating is helpful to detect and distinguish the flavours of your favourite food staples. Chew them slowly and try to decide if the food in your mouth is sweet, salty, sour, bitter, pungent or astringent, or a combination of two or more of these flavours.

 After reading and, therefore, being terrified by the book “Wheat Belly” by William Davis, MD, I decided to continue with my attempt to jump on the gluten-free bandwagon (or just run alongside it from time to time).
Cortisol, the stress hormone, is released as part of a the Fight or Flight response. You’ve probably heard the story: back when we were huntering and gathering, when faced with a wild, sabor-toothed tiger, adrenaline was released, our blood vessels dilated, our hearts beat faster, our breath became rapid, blood was directed from our digestive organs to our muscles and we prepared ourselves to either confront the hairy beast or head for the hills (or up a tree)!
Now, instead of sabor-toothed tigers, we have exams, deadlines, tension-filled family dinners, presentations to give and blog articles to write. Instead of experiencing the Stress Response for a fleeting moment, we experience it continuously throughout our professional lives.
During a normal, healthy day, cortisol is high in the morning, when we wake up. This enables us to feel awake and leap out of bed with the bright-faced vigor of the hated “morning person”. It enables us to start our daily activities. Cortisol should level off throughout the day and then peter off right before bed time, as we digest our dinners, cuddle with loved ones before the fire and prepare to settle down for a nice, long sleep.
Unfortunately, that’s the picture of a balanced individual living in a stress-free world. In today’s world, because we are continuously living in sabor-toothed tiger-mode, our normal cortisol cycle is out of whack. Cortisol is sluggish in the morning when we haul ourselves out of bed (after hitting the snooze as many times as you can remember) and groggily start our day (with the help of the beloved espresso machine). In the afternoon we crash; we feel tired and useless all day long. Then, right before bed (I’m sure many of you have experienced this), we feel an energy we never thought possible. At 11pm we experience a cortisol high, characterized by a flurry of mental and physical activity, and find it impossible to fall asleep. It is common to hear people who suffer from chronic fatigue lament: “I wish I was as energetic throughout the day as I am at bedtime!” Of course, the harder it is for us to get to sleep, the less we sleep and the worse we feel in the morning, worsening the cycle.
Here are some tips to attempt to break the cycle and prepare the body for bedtime:
1) Eliminate non-sleep activity in the bedroom. Reserve your bed and, preferably bedroom, for sleep and sex. Studying and doing work on your bed confuses the psyche. Only entering the bed when it’s time for sleep, signals to the brain that it’s time to rest.
2) Keep the bedroom dark. Even a minimal amount of light can lower melatonin levels, an important sleep hormone, and make it harder to fall asleep.
3) Limit the exposure to electronics (laptops, television, smart-phones, etc.) 1-2 hours before bedtime. Not only does the light from these devices interfere with melatonin secretion, they also contribute to the secretion of cortisol by stimulating mental activity and, if the activity is work-related, generating stressful thought.
4) Begin a pre-sleep routine. It can be a simple meditation or a series of calming yoga poses (try “legs up the wall pose”, pictured below). You may simply choose to sit quietly in the dark. When I have trouble falling asleep I access an audio podcast meditation on meditationoasis.com. This helps me turn off the Fight or Flight response by calming my mind.
5) Consider magnesium supplementation. Magnesium is a natural muscle relaxant. Taking a dose before bedtime helps reduce the muscle tension we have built-up over the course of our stressful day and helps relax the body and prepare for restful sleep. Talk to your naturopathic doctor about correct dosing and to find out whether supplementing with magnesium is suitable for you.
6) Sleep like Buddha. According to Ayurvedic medicine, as taught in my continuing education course with Matthew Remski, the right side of the body is the Solar Side, and the left side the Lunar side. Before bed the left nostril should be more open than the right, indicating that our left, or lunar, side is more active. Try lying on your right side and, with your right pinky, block your right nostril. Breath through the left nostril for 15 minutes. You may find that your left nostril feels “stuffy” at first. This tells you that your lunar side has not yet been activated. Continue breathing only through the left nostril and you will find that, after a small amount of time, it begins to unblock and becomes the more active nostril. In the East, all statues of sleeping Buddha show him lying on his right side with his right hand under his head, as he shuts down his solar side and prepares for sleep.
In the morning you may want to try blocking the left nostril and breathing only through the right in order to activate your solar side as you begin the day.
*This article is not meant to diagnose or treat. Please visit a trained naturopathic doctor for an individual consultation and treatment plan tailored to your individual needs.
This common time, Monday, February 6 from 12:15-2:00 pm at the Canadian College of Naturopathic Medicine, an OAND Town Hall meeting will be held regarding the Transition Council, to discuss the new legislation for naturopathic doctors in the province of Ontario.
As future NDs it is our duty to make sure our interests are taken into account. Show up to help us defend our rights and scope of practice! We must take part in this legislative process as the future of our profession depends on it.
So, please come out and show your support, and make sure your voice is heard. We can’t let the interests of a select few dictate the future of our careers and the legacy of our profession.
We all know how much time and money we’ve sacrificed to ensure that we have the proper education to become primary care providers! We want to be recognized as such! We have the tools to help so many people, we should be allowed to use them! El pueblo, unido! So show up this Monday and let’s OCCUPY CCNM!

") When people picture “healthy food”, chances are high that the first food that comes to mind is salad, especially nutrient-rich spinach salad. According to Traditional Chinese Medicine, raw foods require more digestive “heat” to break down and, therefore, are not recommended in the winter, unless accompanied by warming spices, or soups and stews.
When people picture “healthy food”, chances are high that the first food that comes to mind is salad, especially nutrient-rich spinach salad. According to Traditional Chinese Medicine, raw foods require more digestive “heat” to break down and, therefore, are not recommended in the winter, unless accompanied by warming spices, or soups and stews.